Wednesday, 30 April 2014

Hexie mania

Well my Quilty friends, after a slightly indifferent start the Monday Ladies have taken the hexagon challenge and are running with it. They are really enjoying making hexagons now - aren't you ladies?.

And quite a few of you are now well on you way to making my Hexie Handbag Kit.

Do you remember when I posted the instructions for the Hexie Handbag Kit and there was some confusion over the size of the hexagons I used. (my fault). Well, below you can see the results.

On the right my original Hexie Handbag Kit and on the left Ros's oversized Hexie Handbag Kit.

 Both look stunning


And my new project Joyofquilting group on a Thursday morning
starts this Thursday 1st May.
Among my new group I have four newbies and so thought I'd
start them off with a simplified version of My Hexie Handbag Kit
 I've been busy the last few days making up these kits.


I've also be working on my own stitching.
I've just finished my latest piece for this years Quilters Guild Contemporary Challenge
Lines
And
I've also been busy building my Welsh Quilting Blog
Well, my quilty friends,
That's about it from me today.

EnJoy your day.


Monday, 21 April 2014

New Quilting Group - Port Talbot

Hello there my Quilty Friends, no Monday Class this week - Easter - And I hope you all had a lovely weekend. The weather here in the U.K. South Wales has been glorious. And lots of us have spent quite a bit of the weekend outdoors.

But the main reason for my post today is to spread the word to anyone living within striking distance of me that I am starting a new Quilting Group and
I shall be holding a coffee morning this Thursday 24th April at 10.30 at The Youth Hall, St. Theadore's Church, Port Talbot. For you to come along, have a coffee/tea and chat to me about the new class.
 So if you fancy learning some of the techniques featured here.


Above are samples of my work.

We'll be covering both hand and machine stitched projects.
At a pace to suit you - it's all about enjoying the journey.....not rushing to your destination.

Anyone interested in joining the new Quilting group I'm setting up is welcome to come along, have a coffee/tea and biscuit and chat with me about the new group.

I'll be bringing along plenty of samples of my work to hopefully tempt you with.

So that's 10.30 Thursday 24th April at the Youth Hall, St. Theadore's Church, Talbot Road, Port Talbot, SA13 1LB. (Junction 40 M4)

p.s. Newbies/beginners are most welcome.
Best I go and start putting my quilts together, looking forward to seeing you there, Joy

Thursday, 17 April 2014

Hexie Handbag Kit - Part Three

Firstly my Quilting Friends, even if your not making this kit, it's worth scrolling to the bottom of the page to see the music video I've selected for you today.....I know I'm just a tad older than these boys usual fans but I love their music anyway.

Phew - nearly there now....final push...
Hexie Handbag kit - part 3 - no cliff hanger today my Quilty Friends.
Today we finish this kit!

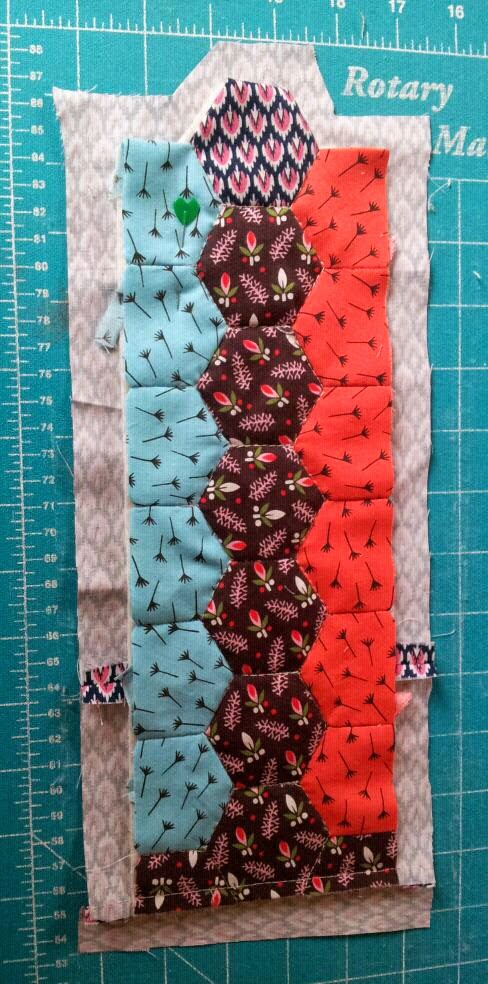
OK you should be all refreshed now and have a piece of work that looks something like this.

Yes?
Right next step you need to trim the backing fabric to a generous half inch (1.5c.m.) all around.

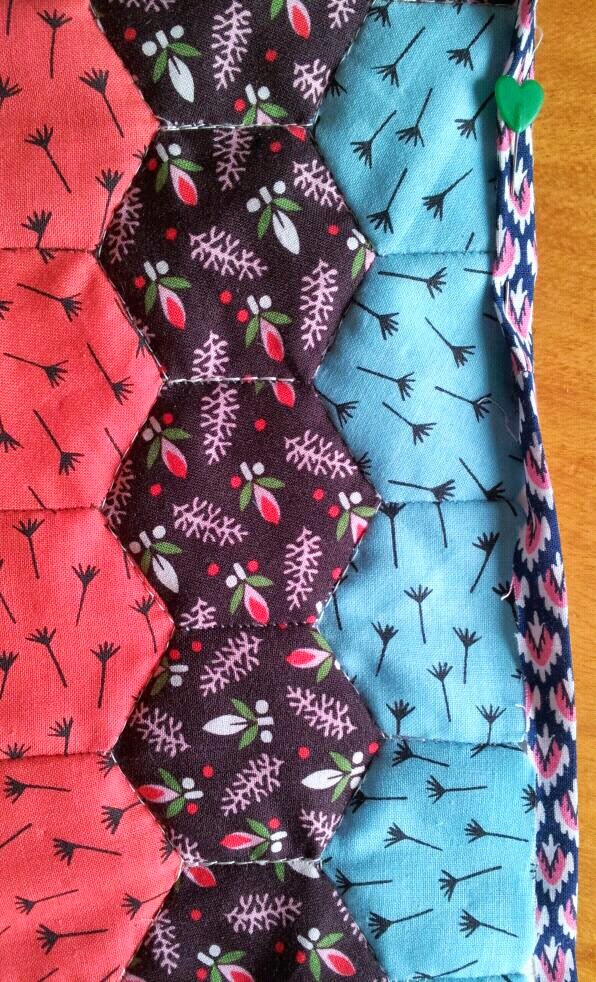
Then using the tip of an iron (a travel iron is great for this) press
over towards you work - see pic above
And pin/tack it over onto the front of your work to create a binding around the edge.

Stitch binding in place using a co-ordinating thread.

Note - when stitching the binding around the protruding hexagon flap see pic below.
You will need to cut slightly into the corners for the binding to sit flat.
Can you see the two little cuts - one either side of the flap hexagon below?
Don't worry - I covered mine with the lace.  You could use
ribbon or buttons - but we'll get to that a little later.


When finished the kit will fold over itself twice (so more of a roll than a purse).
The next step is to fold the front of the kit up to half way
to make the pocket (see pic below)
And stitch in place on either side


To make the pin/needle flap.
Cut a piece of felt (mine was 3"(8c.m).x5"(13c.m.)
Fold in half and stitch bottom half only onto your kit
 (see pic below for placement) using a running stitch
and just going into the backing fabric.
The top half of the felt then creates a cover for your 'needle case'

'Optional'
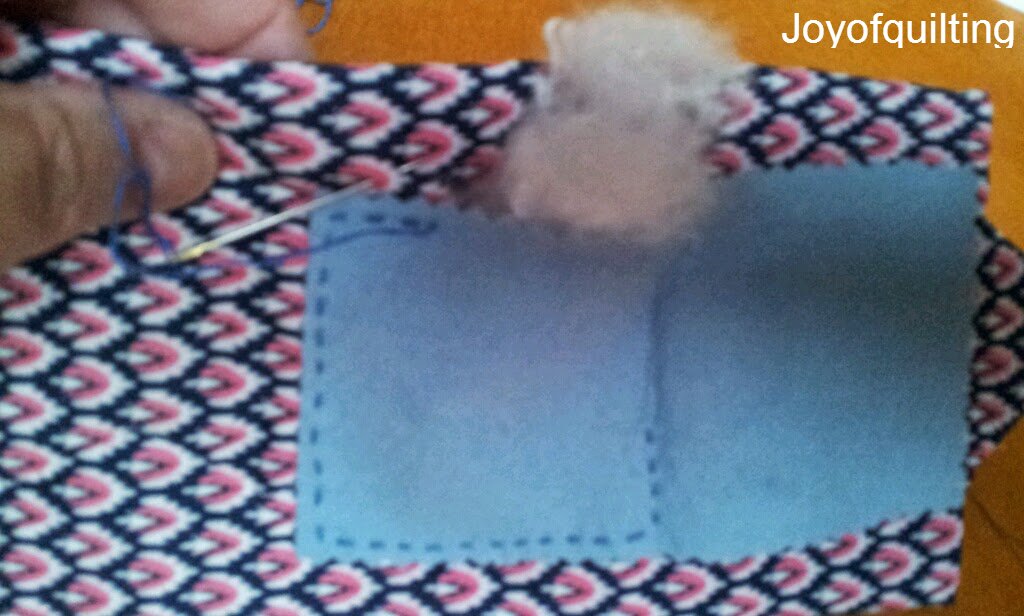
Just before you complete your stitching around the bottom half of the felt
push a small amount of stuffing in between the felt and the lining.

It should look like the pic below when finished.

Applique hexagon no. 22 onto the front of the felt needle cover for decoration.

AND FINALLY
To finish I attached a button and stitched some lace in a V leaving a little overhang as a button hole
And there you have it my Hexie Handbag Kit.
With room inside to store:
Your, needles, pins, thread, thimble, hexagon templates, needle threader, scissors, and fabrics.
And 
At  4"x 4 1/2" (10cmX12cm)  How cute is that!
Sew
You will always be prepared to stitch a quick hexagon!

Some additional pictures to help you
                                     
                                      Back view of finished kit.                                          Front view - note pin used to
                                                                                                                      keep needle/pin case closed.                                                                                                                   


                               Front view folded over once                                          
                                                                           

So there you have it.
And I have to say it took me far longer to take and post all the pictures
and write up the instructions than it did to make the actual Kit!
For now, Yours in Stitches, Joy 

p.s. I feel like I need a little relaxation now, so I'm going to take Daisy out for a stroll.

You might like to relax with a well earned Tea or Coffee while checking out My Other Social Media Links

Tuesday, 15 April 2014

Hexie Handbag Kit - Part Two


As promised here is PART TWO of the picture lead
instructions for making my Hexie Handbag Kit.
So you can keep everything you need to make your hexagons ready for stitching.
For part one click here

 In part one you made 22 hexagons.
Here is a link to the video how to stitch hexagons by Foltvilag 
One two, one two,
(This is also where I got my plastic templates from.)

You can see 21 in the pic below
The 22nd one goes inside the bag (see pic at top of page)
I made
Six blue, six orange, eight brown and two blue
And stitched them together
First in lines
And then I stitched the lines together.
 You stitch the hexagons and lines together using an over stitch
I've used a contrasting thread here for you to see what I'm doing.
But
You should use a co-ordinating thread as you want your stitches to blend in.
(Tip - if using papers try not to catch your stitches in them 
as it will be more difficult to remove the papers later.)

Next
take your papers or plastic templates out of your work.
And
Cut tips of both long edges to give you a straight edge
and also cut along bottom edge to straighten that too.
But
leave hexagon 21 in place at the top as this will create a flap.


Now

Place your hexagon top onto a piece of wadding that is bigger all around than said top.

Then
 cut the excess wadding from your hexagon top.

Now
 place your top and wadding onto your backing fabric
(which should be approx.  2" bigger than your top.)


Then
 stitch as desired. I've machine stitched along each edge of
the middle row of hexagons.

Now - breathe
Take a well earned break. 


Yours in Stitches, Joy


Monday, 14 April 2014

Apologies and a grovel.......

OR
How do you measure a hexagon?

In actual Monday class this morning some of you, well, two to be precise had followed my confused instructions posted here over the weekend for part one of my Hexie Handbag Kit.

The size of hexagons I used were 1" ( 2.5c.m.)                      and not One and threequarter inch (5c.m.)


I had measured the diameter of said hexagon when I should have measure one of the short sides - doh.


And as both Ros and Ruth can confirm one and threequarter inch hexagons are a tad on the large side for making my Hexie Handbag kit. OK, they are hugely too big.

Now Ruth had only made one hexagon so not too tragic there.
But
Ros, well Ros was busy making them in class this morning - I confess I saw her making them.
I even showed her a different way of stitching them.
But did I realise they were for the Hexie Handbag Kit and therefore far too big? - Short answer - no.
I let her carry on stitching.
So sorry Ros but I do think the lovely large hexagons you made this morning would make a wonderful hexie cushion. It's on page 67 of Quilting on the Go! Book.
 
Which brings me on nicely to the book Quilting on the Go! by Jessica Alexandrakis.
We bought a few Hexie books for class but this is my personal favourite.
It's modern, fun, very informative (note to self - it even shows you how to measure hexagons!) with lots of pictures and has some lovely little projects too.
I know a number of Actual Monday Class members have now bought this book for themselves.
Judith C. is making the tiny sewing kit out of her copy.

Here is Judith's work in progress

Which was lovely to see because it's quite a different technique to the way my Hexie Handbag Kit is made up.
It's so good to see different approaches to projects. And, I'm looking forward to seeing the finished Tiny Sewing Kit after Easter.

Well, I think that's enough of an appology and grovel from me for today.

I'm off to finish off writing up instructions for me Hexie Handbag Kit now.
Yours in Stitches, Joy

Saturday, 12 April 2014

Hexie Handbag Kit - Part One

Hi there my Quilty Friends,
I had promised to get the instructions for making my Hexie Handbag Kit uploaded by Friday (yesterday).
But it's proving a far bigger task than I had anticipated.
Sew
Here are the first few instructions just to get you eager beavers started....

You will need enough fabric to make the 22 hexagons

One larger piece for the lining aprox. 15"x7" (38cm18cm)
One piece of wadding aprox. same as lining.
Piece of felt aprox. 3"x5" (9cm.x14cm.)
and some trim and a button.
Above is a picture of the kit opened out
with the contents displayed by the side.

You are going to need to make 22 Hexagons.
You can chose any combination of fabrics you fancy.

I have chosen to use four different fabrics.
Mine are from the range of fabrics the British V & A (Victoria & Albert Museum) brought out to celebrate the Quilting Exhibition they held a few years ago.


Out of the middle fabric I made 8 hexagons.
I made 6 hexagons out of the fabrics either side (the blue and the pink).
And 2 hexagons out of the fourth fabric.  
(Only one can be seen in the above picture - the other is used inside the kit - see pic at top of page).

As you can see from the picture
I've stitched 6  hexagons of each of the three fabrics together in a line.
Then
I stitched the two remaining hexagons from the middle fabric (remember we made 8 of those) to one end of the of each of the outer two strips.
And
One of the two hexagons we made from the fourth fabric onto the opposite end of the middle line of hexies.
It looks much simpler in the picture than my instructions sound - so follow the picture.

I feel I'm much better than this at explaining things usually.
But
This week my brain is feeling rather confused - and I seem unable to think clearly/logically!
Anyway
The finished size of my kit closed up is
Four and a half inch wide by three and three quarter high.
That's
12cm x 10cm

I used one inch hexagons
that's 2.5cm (along short edge)


I wouldn't advise going any smaller but bigger should be no problem.
In fact you should use whatever size hexagon you intend storing in the kit to make it.
Hope that's enough to get you started.
I'm off now to lay down in a darkened room to rest my confused brain!

Yours in Stitches, Joy

Tuesday, 8 April 2014

Hexa Template demo.mov


Above is the hexagon video by the wonderful Hungardan Lady I bought my plastic hexagon templates from.
One two, one two,  (she has 17 videos on youtube)

And also as promised a link to her web-site Foltvilage KFT where you can buy said templates.

I was going to say just a quickie this morning, but it's taken me almost an hour to find and upload these two!
EnJoy

May 2025 Stitching

 Crochet & Stitching Round-up  Wow! I've been a Busy Bee this Month. Got lots of Stitching done. And Finished a few projects.  Cruis...