Thursday, 8 October 2015

The Quilters Knot

I'm often asked to show people how to do the Quilters knot.
It's an easy and quick knot to do.
BUT
I managed to confuse the quilter who tried to teach me this knot many years ago now.
The poor lady spent ages showing me how to make this knot, but every time I tried it my knot disappeared.  In the end we gave up.

When I got home I was telling my son about how I couldn't learn how to do the Quilters knot. I wondered if it had anything to do with me being left handed.
My son said show me how you do this knot.
So I duly demonstrated me not making a knot.
At this time my son was quite into magic.
And as he saw my knot fall off the end of my thread he said. 'Mam, your not making a Quilters Knot - your making a Magicians Knot'!
You must have all seen it when the magician ties a knot in a rope and then it magically disappears off the end.
We'll I can do that! Apparently it's something to do with slight of hand - I can't tell you how that's done, I'm sworn to secrecy; ) 

Anyway today I give you my little video on how to make a Quilters Knot.

Yours in Stitches,  Joy

Sunday, 26 July 2015

Stunning Book Covers

So proud of every one who brought in their finished book covers last week. Well done ladies.
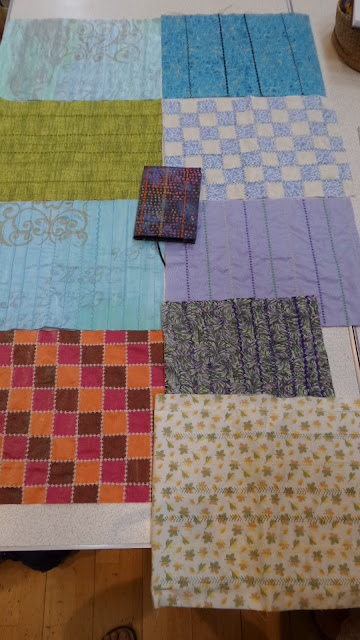
And they make a stunning display.   Great gift ideas.  I hope you're inspired to make some.

A chance to use some of the lovely fancy stitches on your
 sewing machines.

I just love the little Daisy Stitch on this Book Cover 
There are so many different Embroidery Stitches you could try out on you Sewing Machine on this Fun Project

For more from me

Thursday, 9 July 2015

Part Two - Book Cover

Ok ladies here is the video for part Two of the Book Cover.
The Thursday Ladies done well.
Below is a selection of their book covers all stitched and ready to make up.


And this is one finished

Click below for the Video

Hope you enjoy - Feel free to ask any questions.
Yours in Stitches, Joy

Thursday, 2 July 2015

Patchwork Book Cover

Some of you will have made this Book Cover with me before.
Gloria asked me for the instructions and I though it would make a nice little project to take my Thursday Ladies up to 16th July when we break for the summer.
We did this first part in class this morning.
So this is a recap. But I think the instructions are clear enough for any of my readers to follow along with us.
They would make fabulous Christmas/Birthday presents.
And Here is Part Two


Enjoy and when you have a minute  Check out My Other Social Media Links

Friday, 22 May 2015

Wednesday, 20 May 2015

Quick and Easy Block Keeper

My video today shows you how to make a quick and easy Block Keeper
Below is a short video on making simple handles
I have just realised the three step zig zag video is on my old sd card, so I will have to sort that out for you tomorrow.

Yours in Stitches, Joy

Thursday, 23 April 2015

Flying Geese

Today we are making Flying Geese.

Click on the link below to watch my video and join in with us.


To make the block below, your will need:


To make up18 Flying geese units

So cut out 36 two and a half inch squares for the background

And 18 four and a half inch by two and a half inch pieces for the geese.
(I have cut six of one colour and twelves of another in the block below)

I wil post my video on how to join the geese  together without loosing you points very soon.


Wednesday, 11 March 2015

How to attach your binding to your Quilt

And now my dear Quilty Friends, following hot on the heals of my How to make/cut a quilt binding,


I give you my How to Attach your Binding to your Quilt Video

I'm thinking it would be a good idea for those of you new to this technique to make up a sample piece. What do you think? I could talk you through that if you wanted. Let me know.

Yours in Stitches, Joy

Binding Matters

OK my Quilty Friends, as some of you are ready for binding your quilts, today I give you my How to cut/make quilt binding video

Nothing more to say about that really, except if you have a any questions please feel free to ask them in the comments section.

And now hopefully, you'll want to find out how to Attach your Binding to your Quilt.  Well - Just click here. to find out.
Yours in Stitches, Joy 

Friday, 6 February 2015

Spool Block

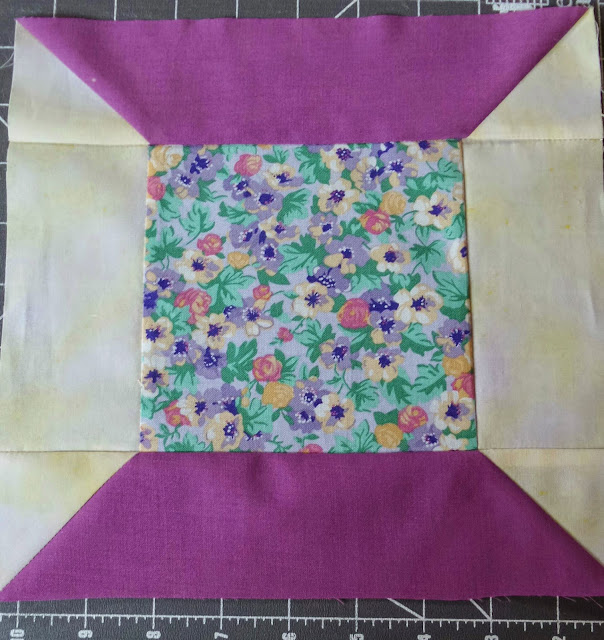
Here is how I put together the spool Block we are making from The Beginners Guide to Quilting book we are using at the moment.
SCROLL to the bottom of the page for my Top Stitching Tip AND Today's musical interlude.
l
Here are all the pieces for one block

Below they are laid out as per the finished block
 Take the centre square and stitch on the two sides
 
 And Press
 Take the four small squares and place them on either end of spool top and bottom
Mark a diagonal line with your fabric marker of choice 
 Stitch along the marked lines
Trim off excess fabric
 Quarter of an inch is good
 
   Press open
Line up and stitch to middle section
One at the top and one at the bottom
 And hey presto
You have a spool block
Here is the book we are working from.
It's proved rather elusive.
The book of the same name on Amazon is not the same book.
This book is actually classed as a bookazine - not quite a book, not quite a magazine.
It was published last year (2014) through Future Publishing
Although no longer in stock on line with them. 
It is often available in W.H. Smith in the UK
Usually amongst the magazines. 
Almost everyone in actual class now have a copy.
But if I'd realised how difficult it would be to get hold of.....well...
Top Tip
To avoid your machine chewing up the beginning of blocks sewn on point.
 
Start your stitching onto a piece of spare fabric (make sure it's two layers of fabric)
 and continue without stopping onto your actual block - see pic below - green fabric is the spare piece.
You simply snip the spare fabric off once you've completed your stitching.
 
Yours in Stitches, Joy
Meanwhile
Somewhere over the Rainbow - with the lovely mellow voiced
Israel "IZ" Kamakawiwo'ole
Click on the link
Relax and EnJoy
 

May 2025 Stitching

 Crochet & Stitching Round-up  Wow! I've been a Busy Bee this Month. Got lots of Stitching done. And Finished a few projects.  Cruis...