Tuesday, 20 June 2023
Camp Stitches
Sunday, 11 June 2023
Time to Catch Up!
Wow! I knew I hadn't blogged for a while but even I was shocked to see it's been almost TWO YEARS!
So a Catch Up is called for me thinks š¤
I haven't been busy. In fact for about Six Months I didn't pick up a Needle or Hook.
But I'm back in the saddle and Stitching again Yay!
So I thought today I would step back into Blogging slowly. I'm going to post some pictures of my Stitchings without too much explanation just to get things rolling again, and give you all a taste of what's been occurring.
Above Humphrey The Giraffe AppliquƩd onto A Piece of Welsh Wool Blanket
My Little Welsh Sheep. AppliquƩd onto wool fabric from an Old Welsh Wool Blanket
Crochet - Beach Walk Blanket
Quick Serger Bag
Outline Stitching
But I wonder...
Which of my projects appeals to you most?
Would you like to hear more about a specific one?
Have you made anything similar?
Until Next Time, Yours in Stitching
Joy
Thursday, 8 July 2021
From Wedding Dress to Teddy Bear
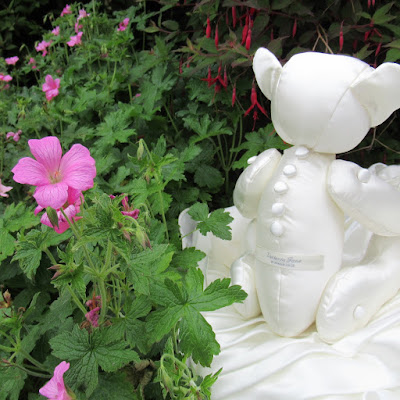
I recently transformed a Wedding Dress into a Memory Bear.
When I was ask to do this I did think long and hard about it for a couple of months.
In the end I decided I quite fancied the Challenge.
I've made plenty of Teddy Bears over the years. BUT never one in Silk.
Here is the rather beautiful and elegant Wedding Dress. Classy and understated I'd say.
The Pattern
It took a while for me to choose a Teddy Pattern. I wanted one that reflected the personality of the Dress. Which in turn I hoped would reflect the personality of the recipient. So I eventually choose a Classic Jointed Teddy Bear Pattern from My Fabric Heaven. I chose them because they had a good selection of patterns and I could have the pattern sent to me. They do offer pdf's but on this occasion I wanted to have a physical copy.
The Owner
I had only met Emma a couple of times, so I can't claim to know her personality very well. But those meetings along with the Wedding Dress gave me a feel for how this Project should progress.
The Dress
I must admit as I worked with the dress the ideas flowed. Emma's Wedding Dress was not fussy and so I felt the need to keep Emma's Teddy 'Simply Elegant'.
At first I thought there was not a lot going on in the Dress for me to Play with.
There was no lace and it wasn't over blingy. But on closer inspection it did have some rather Stunning Features.
The Tiny self covered Silk Buttons all down the back.
The Tiny Jewels and Beading - A touch on either side of the back and the front neckline.
Then there was the one Stand out feature. The Cluster of Tiny Jewels stitched together to create a stand out feature on the Dress front.
The Bear
And so I began the Bear with no definite idea other than the Bear bones of the Classic Bear Pattern.
But don't panic. This is my usual/default way of working. I start off with an idea in my head of what I want to make. Begin the project. And then let the project tell me how it wants me to make it. And this Bear was no exception. I certainly didn't turn out looking how I had envisage at the start!
Now, as I said earlier I have made many a Teddy Bear - most of them out of Fur Fabric, which I have now discovered is very forgiving compared to working with Silk.
Knowing how easily Silk can fray and how much thinner it is than my usual Bear making fabrics, I decided to line the whole Bear. I used the lining of the Wedding Dress as Bear lining. And so I cut out two sets of Pattern pieces (one in Silk and one in the Lining fabric)
The Preparation
I thread my Sewing Machine with a fine (Aurofil) thread. Put in a small needle (70). Silk needs a delicate touch, you don't want a big needle creating holes in you Silk or a thick thread being dragged through with the fine fabric.
Stitch length needs to be quite small as you don't want any of the stuffing poking through large stitch spaces. I set my machine stitch length to 2.2.
I did a few test stitches on scraps of the Silk to make sure I was happy with my setup before I began work on The Bear.
The Stitching
And so the Stitching began. The pattern started with the head. But knowing this is the most fiddly part to make, I chose to start with the Arms, then the Legs, onto the Body and finally the Head. All seemed to go well apart from the head which I got a bit wrong the first time, I knew it was going to cause me trouble! Anyway I got it right second time.
The Stuffing
Stuffing the Bear parts was quite a long job. The Silk parts took a lot more stuffing than I have ever used in a fur Bear. That was because you can see every ripple and crease on the Silk so the parts needed to be stuffed as tightly as I could to 'smooth' out the Silk. And this was where it all went wrong. The head you see in the picture is not the one that is on the finished Bear. In my efforts to stuff the head tightly the seam frayed and came apart. There was no way I could re sew it! So I still have the offending Bears head in my Sewing Room. I'll probably keep it as a reminder.
The Construction
Once I had all the body parts assembled I needed to start putting Emma's Bear together. The pattern was for a jointed Bear. Her joints were stitched using a strong thread and buttons. I used the Tiny covered buttons from the back of the Wedding Dress.
Her head was not jointed but Ladder Stitched in place.
The Face
Now I had the Bear together the fun/terrifying part began. Those of you who have made any dolls, bears or soft toys will understand how challenging it can be to create the face you imagine in your minds eye. The eyes are the most challenging. Too close together looks angry. Too far apart looks, well, a bit crazy. The mouth is next. It creates expression, and can amplify whatever the eyes are expressing. The nose although not so crucial can create great character. Something that can get overlooked is ear placement, that can change a face from serious (higher on the head) to more comical/cartoon like (lower/further apart on head).
The Personalisation
So Emma's Bear now has a face. Happy Days. Next on the agenda is 'Personalising' Her. Remember Emma's Wedding Dress. It was Elegant. There were jewels, beads and lovely little buttons. Not everywhere, not in your face but definitely there. And there was one Stand out feature on the Dress front.
I toyed with the idea of Stitching this onto her head. This idea had been in my head since I first saw the Wedding Dress. But the Bear, she didn't like it there no matter which way around I placed it.
No Emma's Bear decided she wanted that piece of bling on her front.
I loved the subtle detail in amongst the jewellery on the Dress. There were lots of tiny beads in the background. I knew from the beginning I wanted to stitch Jewels on one sole of the Bears foot. I'm a big fan of the Paul Simon, one of my favourite Albums of all time is Graceland and the track Diamonds on the Soles of Her Shoes was the soundtrack to my making this Bear. I just loved the idea of one bejeweled foot! It ended up being seed beads, but that was because they fitted the bill. They looked so much more elegant than the shiny Jewels so I'm taking artistic licence and calling them Diamonds! In fact hand stitching the Tiny beads (Diamonds) onto the sole of her foot took ages because I could only work on it for 10 to 15 minutes before my eyes needed a rest.
Front complete I turned my attention to the back of Emma's Bear. I knew I wanted to stitch the Tiny Buttons down her back to echo the back of the actual Wedding Dress. I flirted with the idea of some Jewels on the back too, as there were some on the back of the Wedding Dress. But The Bear said no. She was not happy when I placed them anywhere on her back. Fair enough I thought. Although I felt the back did need something. But I just couldn't work out what. By this point I had also started work on my plans for the Garter Emma had asked me to make. And it was while cutting fabric off the Dress for the Garter that I saw on the inside of the dress the little label. I don't know why I had never noticed it before. Anyway I unpicked the little label and placed it on the back of The Bear, ta da! That was what it needed.
I had planned on stitching some of the bling from the Dress onto the Bear's ear. But the Bear didn't approve of that plan either. She wanted to be simply Elegant. In fact she wasn't too sure about the big jewel on her front, she only agreed once I had cut it right down in size not once but twice!
So there she was. Complete. Elegant. Happy and Rather Pleased with Herself.
The Bag
While She was a work in progress I covered her over with a large scrap of the Wedding Dress underskirt whenever I wasn't working on her to ensure she was kept clean, (along with lots of hand washing so as not to mark the Silk). Once she was finished I began to think about getting a Box to deliver her in. Then I thought, um, this piece of fabric that has protected her all along could be upcycled into a Bear Bag. I stitch some more of the Dress bling onto the bag and unpicked the hanging straps from inside the dress. I used one as a drawstring for that bag. I was very pleased with the results.
The Garter
Finally I turned my attention to making a Garter. It might sound odd but the thought of making a Garter seemed quite daunting. I knew how to make a Bear so that didn't phase me. But a Garter, well I'd never made one. I researched making Garters on youtube and Google. But in the end I made up my own way of making one. And I don't know why I got so worried about it. What I did was dead simple and looked lovely. I put some silver thread into my overlocker/serger to add a touch of bling to the edges, added some elastic and hand stitched some of the Jewels onto it. It was such a quick and easy make. To complete the project I made a tiny matching bejeweled bag for the Garter and used the second hanging strap from the Dress for the drawstring.
The Roundup
All in all a rather satisfying project/challenge. Although it did take me a lot longer to make than I had anticipated, but I am so glad I did it. As always when making things up/improvising as you go along it was a learning curve, and I've definitely improved my 'Silk' skills along the way!
I hope you are enjoying following my Stitching Journey. I really enjoy taking the pictures, writing things down and sharing them with you.
So, what is my next challenge? Well, I bought two patterns from My Fabric Heaven. The second one was an Elephant. I'm tempted to try him in Denim. So watch this space, and thank you for spending some time with me, Joy
You can read more about my Stitching Adventures below:
Tuesday, 8 June 2021
Crochet
Crochet My Projects
I learned to Crochet when I was about 13.
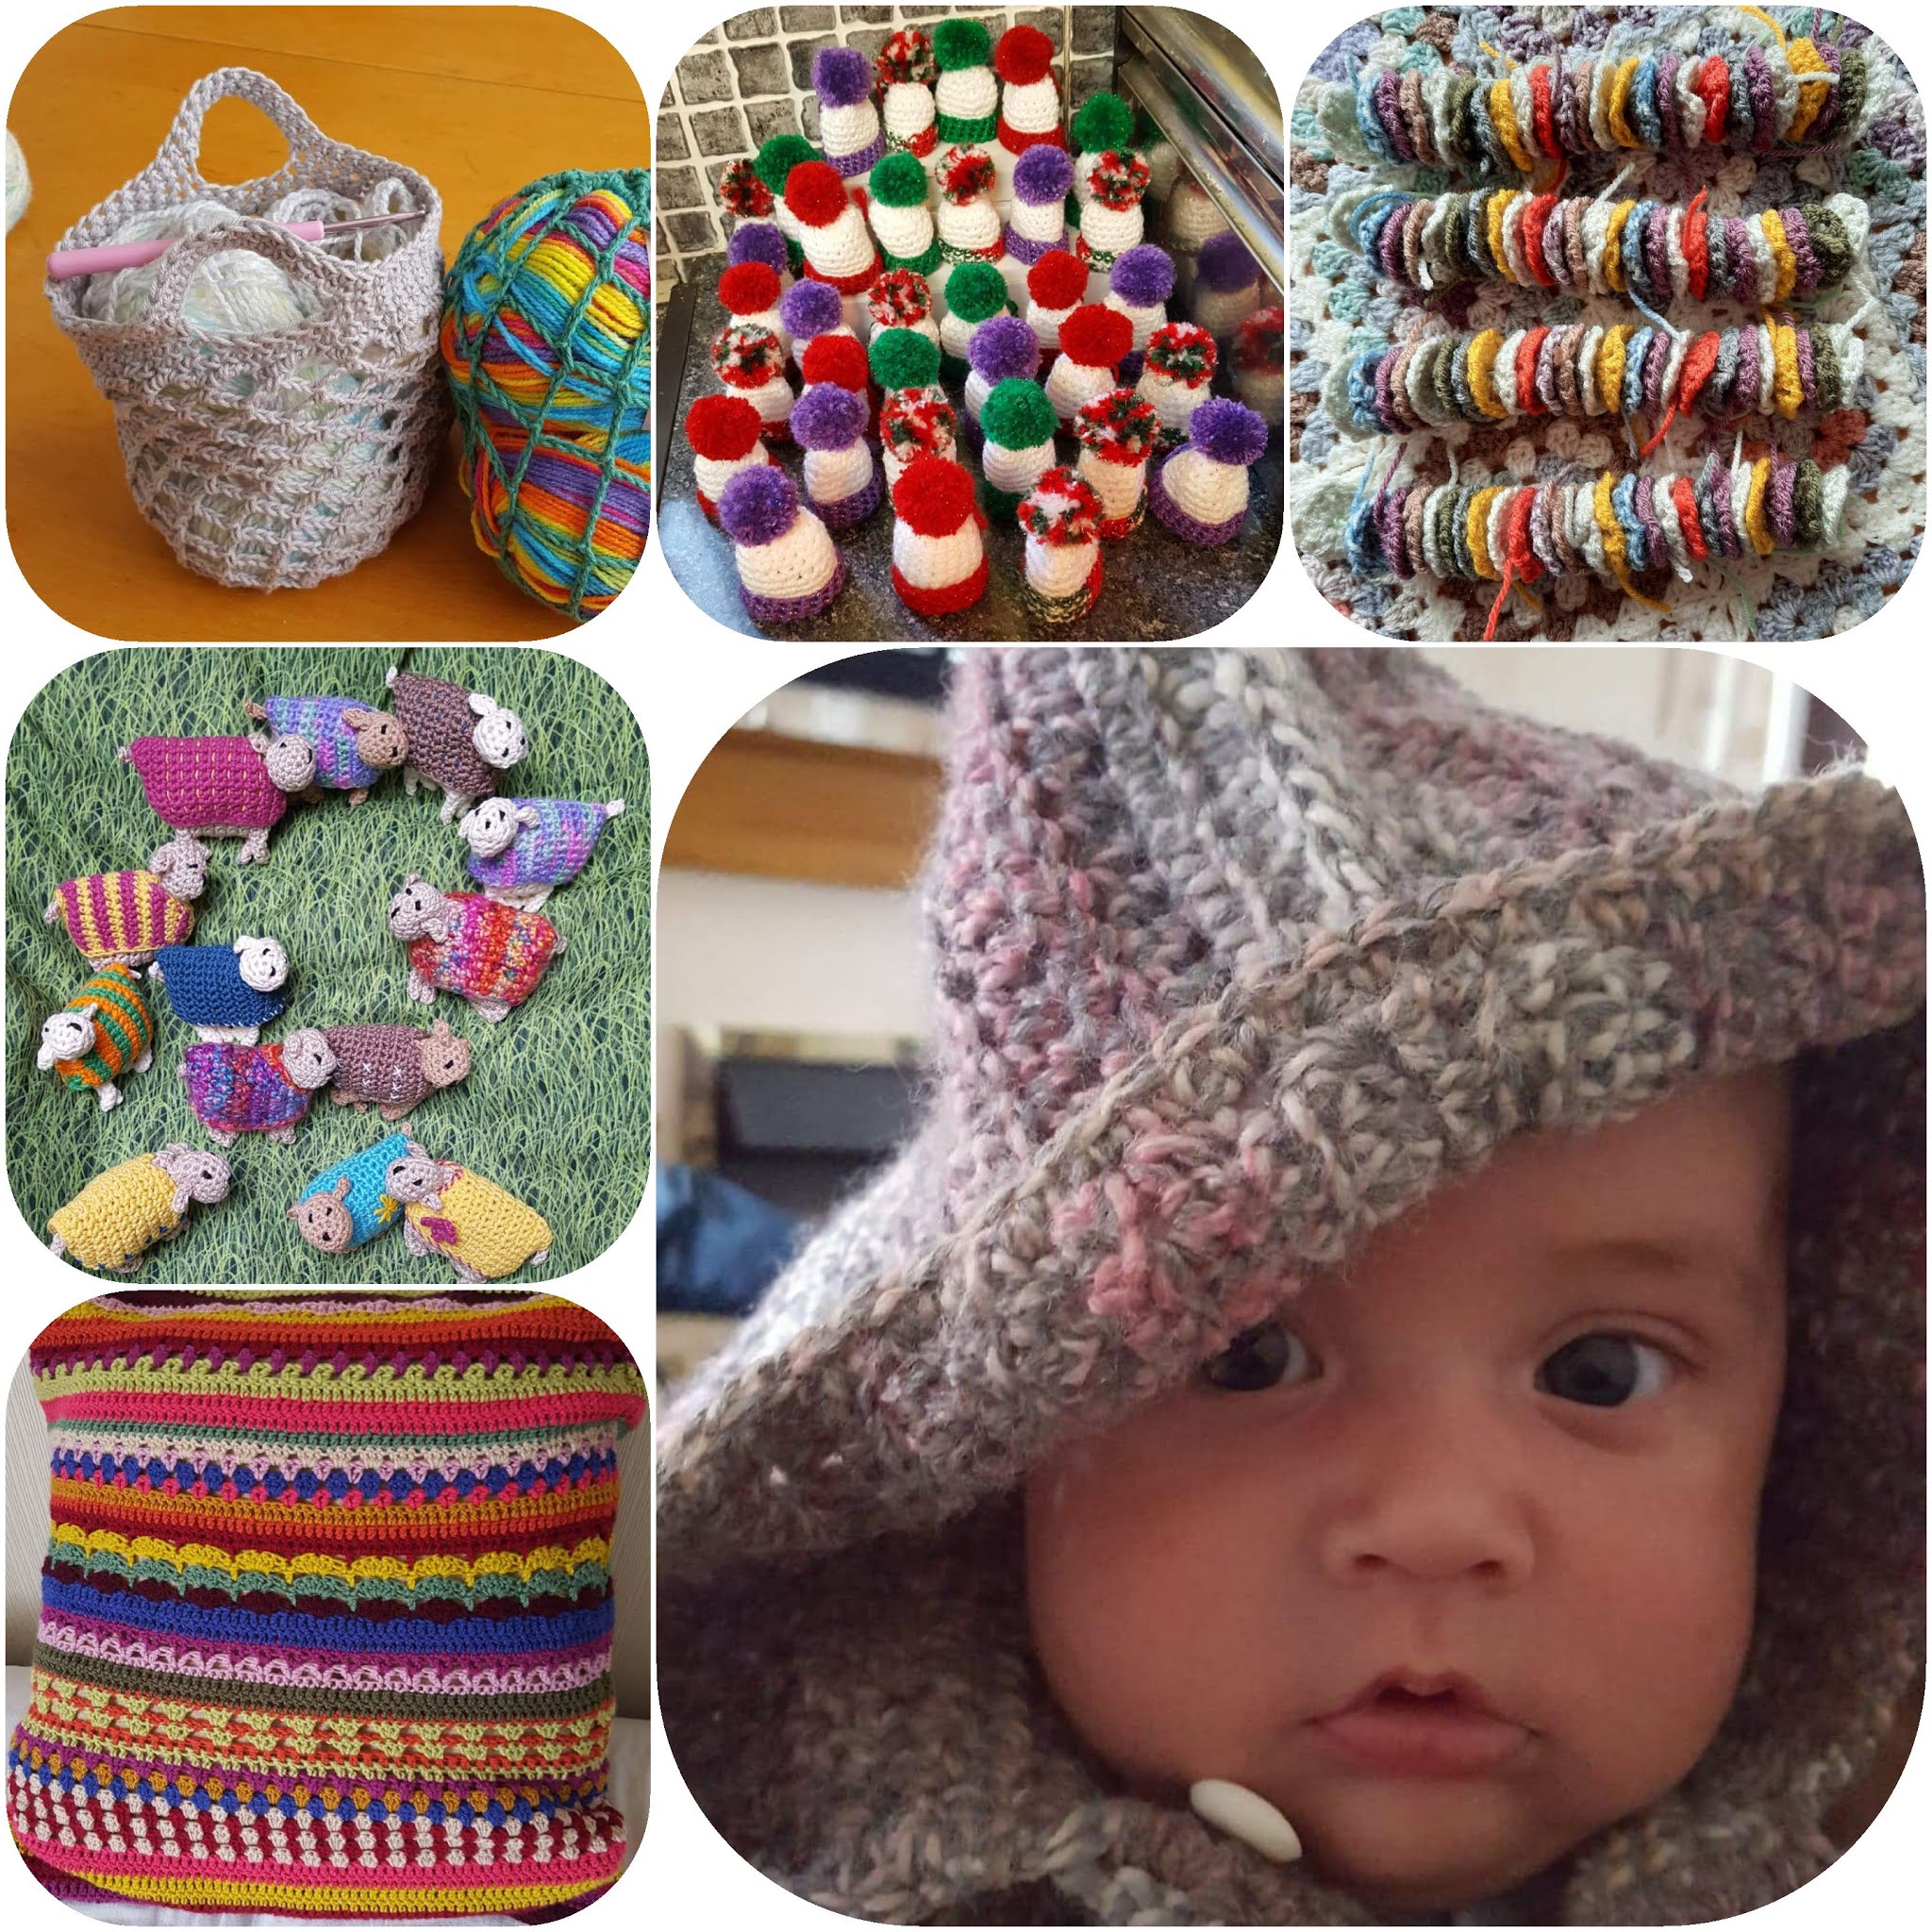
A Brief Pictorial History of My Crochet Endeavours
I rather like bright happy colours.
Crochet is My Meditation.
I have made a few How I Crochet Videos
So, how is your Crochet 2021 going?
Thank you for taking time out of you day to visit my blog, Joy
And Remember. It's not a race. Relax and Enjoy each Stitch.
Wednesday, 19 May 2021
Boro Stitching - Needles & Threads
Following on from my Boro Bag Post . I want to talk a little today about Needles, Threads and Fabric for Boro Stitching.
Basically to get the best results (and the most stress free Stitching experience) you need to use the best combination of needle and thread for the fabrics you are using.
Because, if you use a needle that is too small or big for you fabric and chosen thread your gonna hit problems, and at the very least your work is going to fight you. Basically not so much fun as frustration. So it pays to use the right tools for the job.
There are numerous types of Needles and Threads to use when sewing, which basically depend on the fabrics you are stitching and the effect you want to achieve. I could write a blog post on each one. But today I just want to focus a little on Needles, Threads and Fabrics for more traditional Boro Work.
You'll probably be pleased to know that Boro is traditionally worked with thicker threads and bigger needles! It's one of the reasons I love Boro, it's not fiddly and delicate it's simple and bold. And this simple bold work creates (in my humble opinion) a visual feast for the eyes.
Visible Mending. That's quite new wording for me. I have always thought of such work as patching, you know, cutting a patch of fabric to cover a hole, rip or tear and simply stitching it onto said fabric, usually clothing, and stitched to blend in. I'm thinking boys trouser knees and pockets! But nowadays invisible Mending has been eclipsed by Visible Mending. You may think Visible Mending is a relatively new kid on the block, making a point of seeing the Mending. But no, the Japanise have been 'Visible Mending' for ever........ for more information on Boro
Traditional Boro fabrics are a slightly heavier weight and a more open weave than the Patchwork and Quilting fabrics many of us use. And that slightly heavier weight means thicker threads and Needles are ideal.
Fabric
For Sashiko and Boro it's best to use as Medium Weight Woven fabric with quite an open weave. The needles and Threads you will be using are quite thick to match the fabric weight. If you try and use a tight weave fabric the needle and thread will have difficulty penatrating it. It won't be easy to work and won't look right either. So save yourself the frustration and choose suitable fabrics. Check out the fabrics in the Susan Brisco link at the bottom of this post..
Threads.
Firstly, there is the obvious choice, the thread that the Japanese would use for Boro. And this thread is called Sashico Thread. It is becoming more readily available, usually through specialist stores though. And more colours too (used to be mainly cream or indigo). Obviously it's the ideal choice. But you can create Boro Work with lots of other thicker threads. Remember the stitching is meant to be seen. Embroidery threads can work well, and of course they are easily available and come in a plethora of colours. If I'm using a six stranded thread I use either two or three strands for Boro. Pearle Cotton can work well also, I quite like Pearle Cotton no. 8.
I've stitched out a sample piece for you to see the effect of a few different threads. There are others you might like to try. I'm just showing a few to give you an idea of what you can use. I've included a Hand Quilting Thread so you can see for yourself that it really isn't thick enough to create a bold stitch on Sashiko weight fabrics.
Needles.
Ideally with Sashiko Thread you would use a Sashiko Needle. They general come in two lengths. Use whichever you feel more comfortable using. You may well start and stay with the shorter needle. Or you may progress onto the longer one as you learn to put more Stitches on you needle. I've also used a Chenille Needle (no. 16 for me) as they are fairly widely available in shops.
The Sashiko Stitch itself is basically what I think of as a running stitch. Learn more about Sashiko History, point 6 of this link explains clearly the difference between Sashiko and Boro I think. Read a part of this link quote below.
Boro can be best defined as the mindful Japanese art of mending textiles, while Sashiko is a form of sustainable embroidery.
Above is a picture of some of my own Sashiko Stitching (along with some Appliqued Japanese Motifs. Note how different the Sashiko Stitch looks when used to create shapes as apposed to the simple straight lines typical of Boro Stitching using Sashiko Stitching.
It could be said that Boro Work although based on the Sashiko Stitch is a simpler form of Sashiko
So there you have it. My thoughts on Boro threads & needles.
I first learned Sashiko from a Workshop with Susan Brisco many years ago, and I thoroughly enjoyed it. But once I discovered Boro Work, I fell in love with it's simplicity. I think as someone who doesn't like lots of rules and regulations I find the freedom of Boro suits my need to be non conformist, while feeding my love of Sashiko or running stitch.
Want to buy some supplies? Or just checkout out what is available take a look a this link to the Susan Brisco Shop.
Are you enjoying my musings? Check out my Social Media Links
Tuesday, 11 May 2021
Japanese Boro Bag
Here is a link to the Japanese Boro Bag Tutorial I used to make my own Boro Bag below.
And read about Sashiko and Boro Work
This tutorial has lovely pics and some basic instructions. I'm just going to go into a little bit of detail on how I put this bag together for those of you who need a little more detail. So this post is not how to make the bag. The Japanese Boro Bag Tutorial link above does that. This post simply gives a little more detail of how I made the Boro Bag. So follow the link instructions. They may well be enough for you to make your own Boro Bag. If not, here are a few details of how I made mine.
Making tabs
I used my contrast fabric but later realised it would have been easier to use the webbing I bought for the strap. You will need two pieces approx 3" to attach the bag strap, one approx 7" for the fob.and a slightly thinner piece about 9" for the fastening loop. The bag webbing I used was 25mm/1". To make the fastening loop I cut a 1" strip from my fabric approx 9" long.
See Pics below for:
Detail of where to stitch webbing for strap.
Fob placement and stitching to main bag.
Detail of Fastening Loop
Making a Lining
Once you have the outer bag including the base and stitched together, you need to make a lining for you bag.
Simply cut out a piece of your chosen lining fabric the same size as your outer bag.
Next stitch up the sides of you lining. This will leave you with a lining pouch that you simply drop into you main bag (once you have stitched up the sides of your main bag). Remember to shape the bottom of your lining in the same way as the outer bag.The lining needs to drop into your bag with the wrong side of the lining facing the wrong/inside of your bag.
Above is my bag lining. I chose to add a pocket. But you can skip this step if you like. Note, the lining will need to be turn thru so the raw edges are on the outside before you drop it inside your main bag.
Strap Tab placement for main Bag Fabric
Remember the tabs for the strap need to face into you bag as in the pic above.I then pinned the front toggle in place and stitched around the top edge using a long stitch on my sewing machine to hold it all in place. You could hand tack this if you prefer. You can also just see the little tabs ready for the strap on either side of the bag.
Top Binding
Measure around the top opening of you bag & make up a binding 3" longer using your contrast fabric. How I make my binding
Stitch the binding to the inside of your bag top. How I attach my bindings
I then hand stitched the binding to the front of my bag.
Next I attached the Fastening Loop. Can you see where I have machine stitched it to the back of my Boro Bag
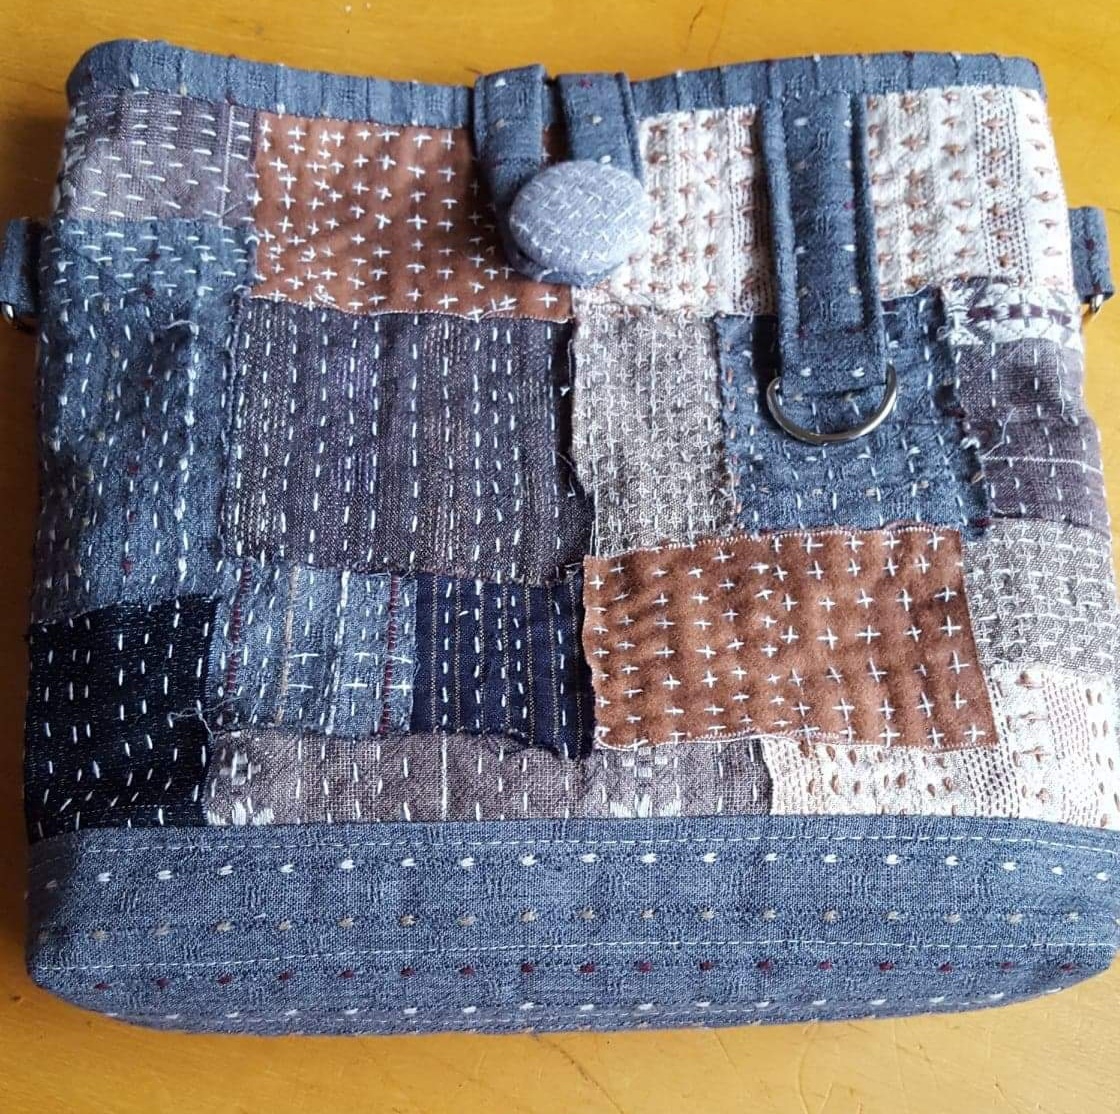
Here is a close up of the front of the Fastening Loop and the lovely button I used. It was a fabric covered button I had in my Button Box which I added some hand stitching to. I'm quite proud of that!!
That's about it. Hopefully by following the link at the top of the page and my tips you'll soon be the proud owner of your own Boro Bag.Sunday, 25 April 2021
Boro Inspired Stitching
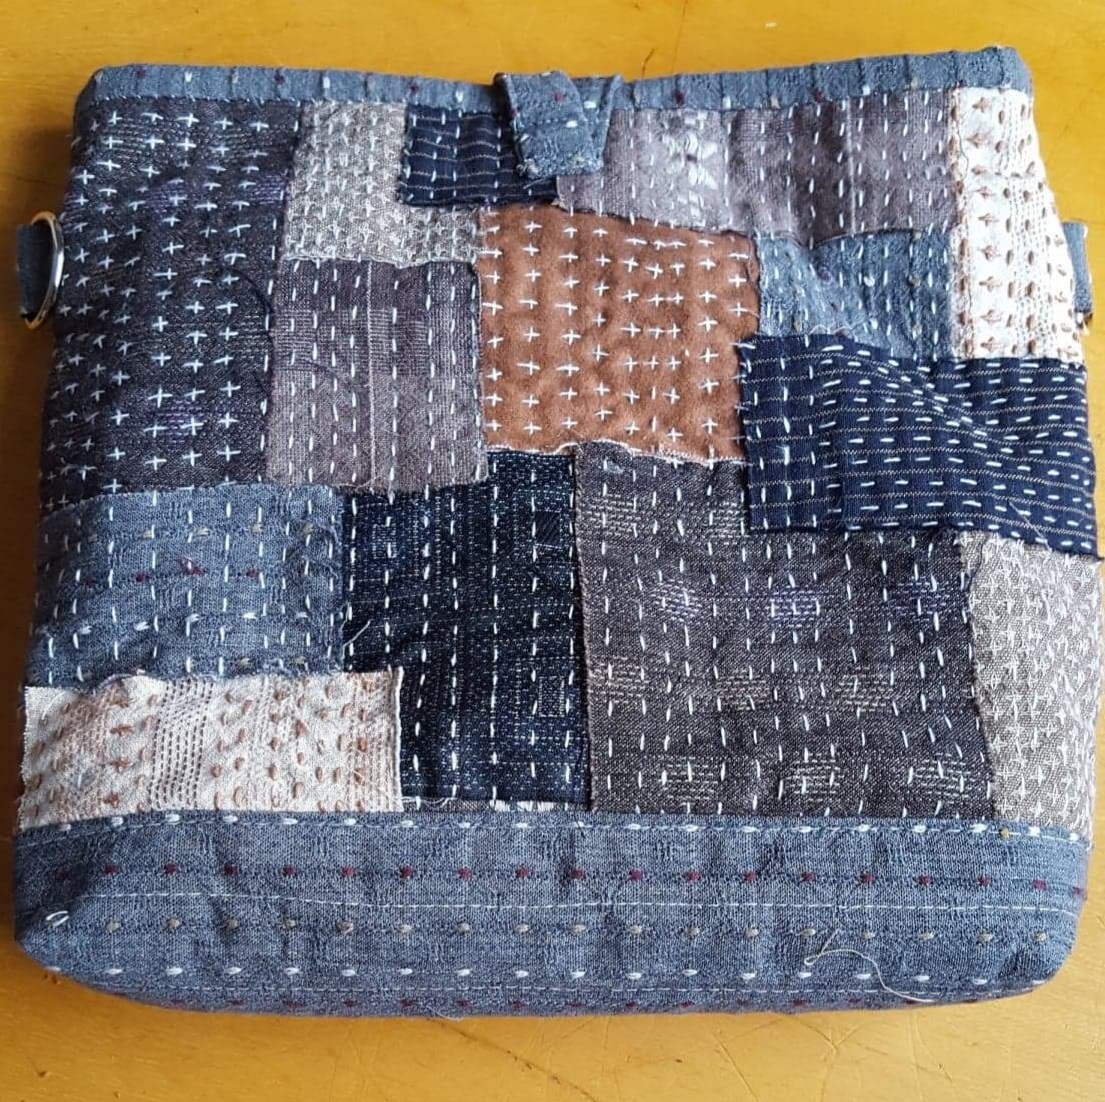
Hello there my Stitching Friends. Today I want to share with you my latest Boro Inspired piece of work.
I find this Traditional Japanese style of stitching wonderfully relaxing. It's based on need rather than decoration but still manages to produce a visually strong finished piece of work.
I'm making my piece of Boro fabric into a Bag. But technically that's the wrong way around! Boro traditionally didn't start It's life as Boro. It slowly became Boro over years of daily use and mending.....
Boro is filled with lots of lovely Hand Stitching called Sashiko in thick thread often contrasting the fabrics it covers. (Think basic running or quilting stitches.) This simple stitch intended to be functional also creates a fabulous visual impact.
Read my post on Boro Needles and Threads Here
The bag I'm making came from this Boro Bag link
I've thoroughly enjoyed the project. So much so that I created a YouTube Video showing how I created this piece. You can click on This Link to watch my YouTube video about making this piece of Boro.
So, what did you think of my Boro Video?
Are you tempted to give it a try?
Or, have you already made some Boro Work?
Let me know in the comments below. I'd love to hear your thoughts. Joy
Crochet Snowflake Large
Crochet Snowflake (Large Aprox 13cm) Size 5.5 Hook DK Yarn Two Strands Worked Together I'm using King Cole Glitz - Diamond Whit...
-
Here is a link to the Japanese Boro Bag Tutorial I used to make my own Boro Bag below. And read about Sashiko and Boro Work ...
-
Following on from my Boro Bag Post . I want to talk a little today about Needles, Threads and Fabric for Boro Stitching. Basically to get...
-
OK - Big deep breath. This is a bit scary for me. But every journey must start with the first step - so here we go my first Virtual Monday G...